From PRD to Functioning Software with Google Antigravity
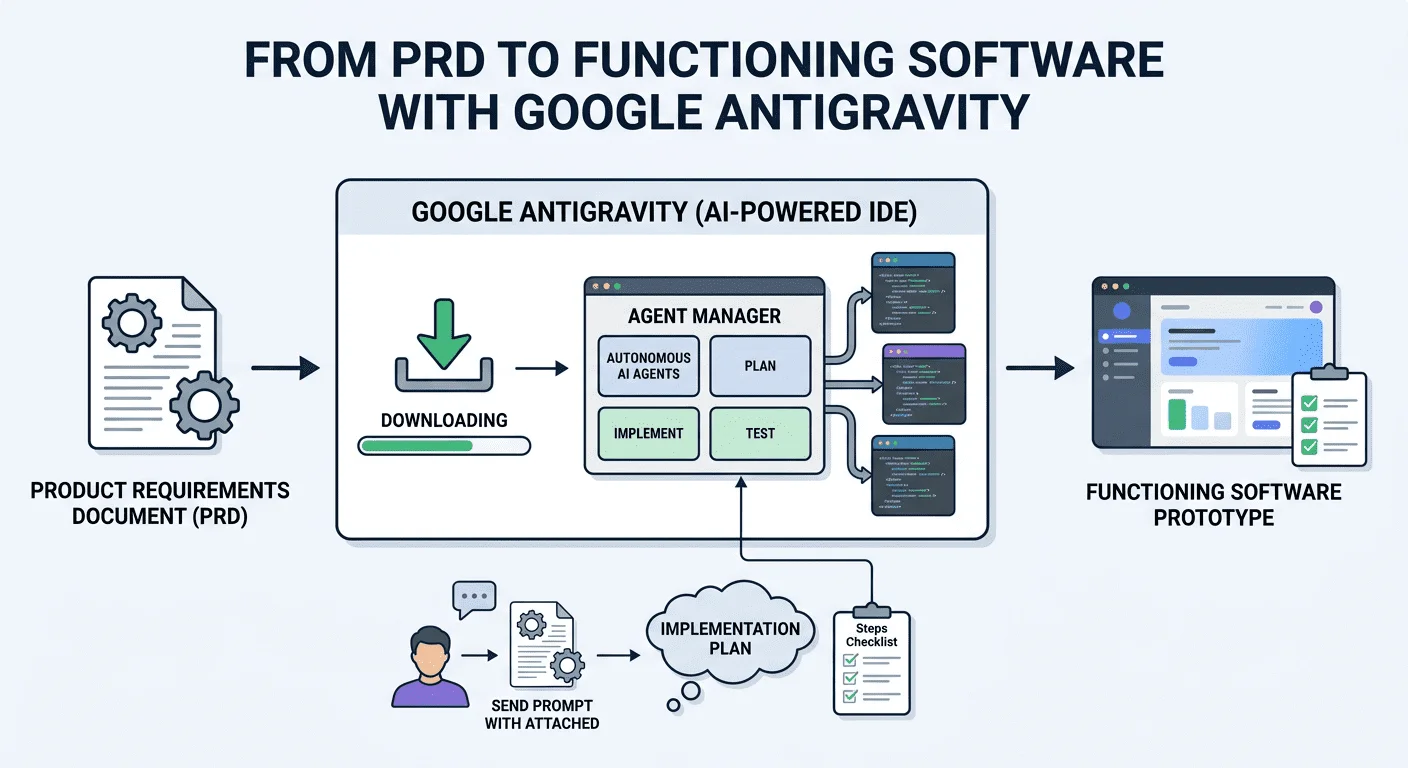
Image by Editor
# Introduction
Creating a Product Requirements Document (PRD) is a common process in product management and a commonplace task in sectors like software development and the tech industry as a whole. But the story doesn't end with a PRD, and the next big step is turning it into a product, e.g. a functioning software.
This article follows up from this one, in which we turned a set of raw, messy pieces of information into a grounded PRD, and navigates you through the same use case (a mobile-friendly app called FloraFriend) to turn this PRD into a functioning software prototype using Google Antigravity.
While showing the full software creation process is impractical within the scope of the article, we will highlight the key aspects to know about using Antigravity to this end, along with some representative excerpts of the generated software for illustrative purposes.
# Moving From a PRD to a Software Prototype
Get ready, as the process we are about to describe is where the magic happens. If used properly, Google Antigravity can partly act as a lead engineer. It is a downloadable IDE available for multiple operating systems: you can picture it as a twist of VS Code, such that instead of merely typing code, you can handle AI agents that will write it for you.
Needless to say, the first step is downloading Antigravity and installing it in your machine.
The central element to familiarize with in Antigravity, first of all, is its dedicated Agent Manager view: a place where we introduce our software requirements. After that, autonomous agents will plan, implement, and even test the solution built.
Let's start by opening it — I highly recommend choosing the "Tokyo Night", of course, by the way! — theme and, in your local file explorer, create a new, empty project folder, naming it flora-friend-app. If you are acquainted with VS Code, you'll find Antigravity's UI (User Interface) very familiar.
Below you can see the result of opening a newly created folder called "flora-friend-app", which is currently empty:
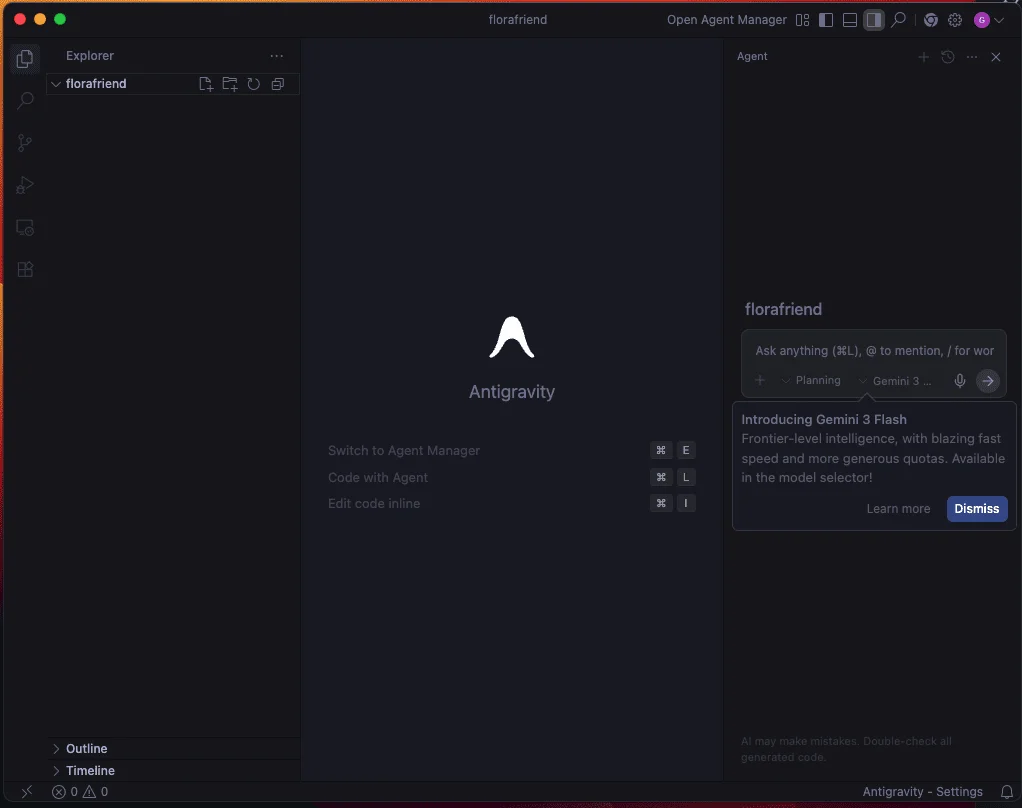
First steps with Antigravity
Now comes the exciting part. Open the Agent Manager view by clicking the dedicated button on the bar at the very top. You will see a beginner-friendly explanation of what agents in the agent manager can do:

Welcome screen of the Agent Manager
We will send this prompt to begin with (do not click the 'send' button yet) that asks for an implementation plan for a mobile-friendly Web app:
Act as a Senior Full Stack Engineer. Review the attached PRD for 'FloraFriend'. Create a comprehensive implementation plan to build this as a mobile-first web app using Next.js, Tailwind CSS, and Shadcn UI. Do not write code yet; strictly generate the Plan Artifact first.
This prompt should be accompanied by an actual PRD, for instance, like the one you may get if you followed the previous, related article about NotebookLM for PRD generation — or one of your own, for that matter. Either way, you have two main options to attach the PRD: either manually paste the code as part of the prompt, right after the above request, or by incorporating the PRD file (.docx, .pdf, or similar) in the project folder we created earlier — if you go for the copy-paste option, carefully use the Shift + Enter keys in your keyboard to make a couple of new lines and pasting the PRD right after the request, before sending the full prompt. The great news: Google Gemini LLMs, which fuel Antigravity and its agents, have a huge context window size; in other words, we can include a very long bunch of pasted text to contextualize our prompt in a frictionless fashion.
After a minute or so, you may get a response that looks like this:

Example output in Antigravity's Agent Manager
We can see a checklist appear on the right-hand side of the agent manager window, with software project steps being listed, such as "initialize Next.js app (...)" for instance. Here, we have the option of reviewing this list and sending additional prompts via the "Review" button to amend items or add new ones, for example, by prompting:
Add the "build component: Plantcard (with snooze logic)" and the "weekender logic" to the backend tasks.
New or amended items will "magically" appear on the checklist.
Let's move on and assume we are happy with the plan as it is. This is a tricky step, as finding the right button to click on and move forward is not obvious, especially after several interactions for refinement. The key is to scroll up through the generated artifact boxes in the chat stream and find the one labeled as "Implementation Plan". Open it and, on the right-hand side, click on the "Proceed" button. This is where agents start fully acting, by executing actions like installing dependencies, creating the database schema with several relevant tables via a file named schema.sql, and so on. Below is an example of the code generated for undertaking these actions:
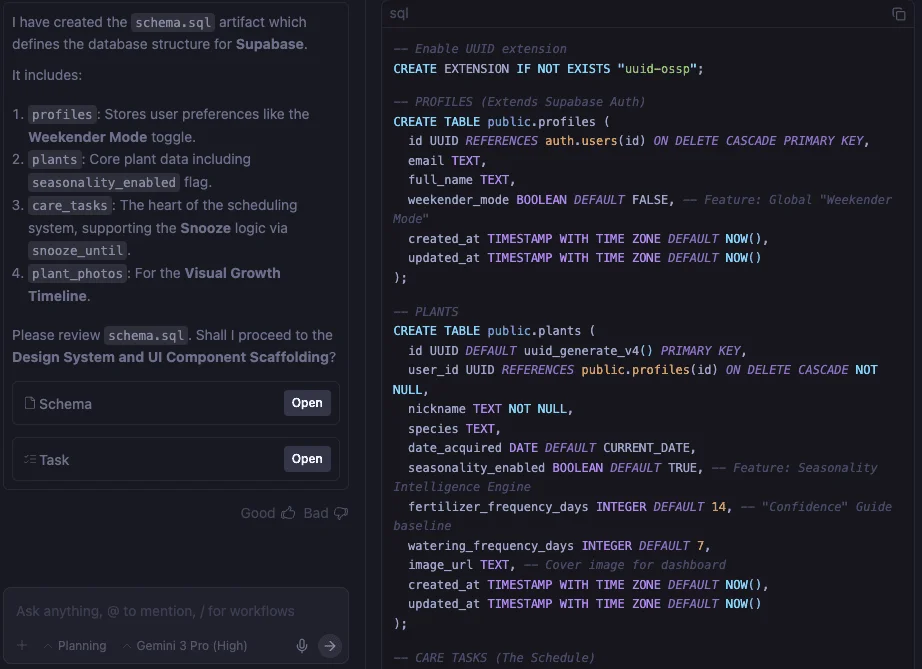
Generated schema.sql for our software database
The entire process is step-by-step, manually requiring review and approval on your end before proceeding to the next step, but you will gradually see how the project planning checklist gets boxes ticked. Sometimes you'll need to manually install some dependencies in your PATH or perform similar requirements to let the agents continue doing their job. But in essence, all it takes is careful interaction and prompting!
For a final example, this is what a code excerpt for the final app might look like:
// components/PlantCard.tsx
import { useState } from 'react';
import { Card, Button, Badge } from '@/components/ui';
import { WaterDropIcon, SnoozeIcon } from '@/icons';

interface PlantProps {
  name: string;
  species: string;
  nextWatering: Date;
  onSnooze: (id: string) => void;
  onWater: (id: string) => void;
}

export default function PlantCard({ name, species, nextWatering, onSnooze, onWater }: PlantProps) {
  const isOverdue = new Date() > nextWatering;

  return (
    <Card className="p-4 border-l-4 border-green-500 shadow-sm hover:shadow-md transition-all">
      <div className="flex justify-between items-start">
        <div>
          <h3 className="font-bold text-lg text-slate-800">{name}</h3>
          <p className="text-sm text-slate-500 italic">{species}</p>
        </div>
        {/* Visual Cue for Overdue Plants */}
        {isOverdue && (
          <Badge variant="destructive" className="animate-pulse">
            Thirsty!
          </Badge>
        )}
      </div>

      <div className="mt-4 flex gap-2">
        <Button
          onClick={() => onWater(name)}
          className="flex-1 bg-green-600 hover:bg-green-700 text-white"
        >
          <WaterDropIcon className="mr-2 h-4 w-4" />
          Water Now
        </Button>

        {/* The "Matt Feature" - Snooze Button */}
        <Button
          variant="outline"
          onClick={() => onSnooze(name)}
          title="Push this task to the weekend"
        >
          <SnoozeIcon className="h-4 w-4 text-slate-600" />
        </Button>
      </div>

      <p className="text-xs text-slate-400 mt-2 text-center">
        Next scheduled: {nextWatering.toLocaleDateString()}
      </p>
    </Card>
  );
}
# Wrapping Up
This article shows how to leverage Google's Antigravity, one of the newest available tools in the Google AI suite, to generate software prototypes. In particular, we illustrated the logic to turn a PRD into a software prototype.
Iván Palomares Carrascosa is a leader, writer, speaker, and adviser in AI, machine learning, deep learning & LLMs. He trains and guides others in harnessing AI in the real world.
