
 Home Depot
We may receive a commission on purchases made from links.
Outdoor power tools don't tend to stay clean for long. Whether you're mowing your lawn, pruning your trees, trimming your hedges, or blowing debris into piles in your yard, these tools are constantly exposed to dirt, dust, sap, moisture, and plant matter. All this detritus can build up on your equipment fast, making it dirty and unpleasant to handle. It doesn't just look bad though, all that old organic gunk can gum up moving parts in your tools, block airways, and erode metal components, diminishing the lifespan of the tool.
This is why, even though outdoor power tools are made to work in the dirt and the muck, it's still important to keep them clean. How often you should clean your tools depends largely on how often you use them and what kind of conditions you're working in. You might not want to give your mower a full scrubdown every single time you cut the grass, but taking the time to thoroughly clean your tools once in a while–and especially before you store them for the winter–can prolong their longevity, help maintain performance standards, and keep them looking nice and shiny. This goes for all kinds of models, from classic gas-powered tools to those made by the best cordless yard tool brands.
That said, you probably don't want to just start blasting them with a hose. There are a few precautions you should take to preserve the integrity of the tool, and there are some cleaning methods that will get much better cleaning results than others.
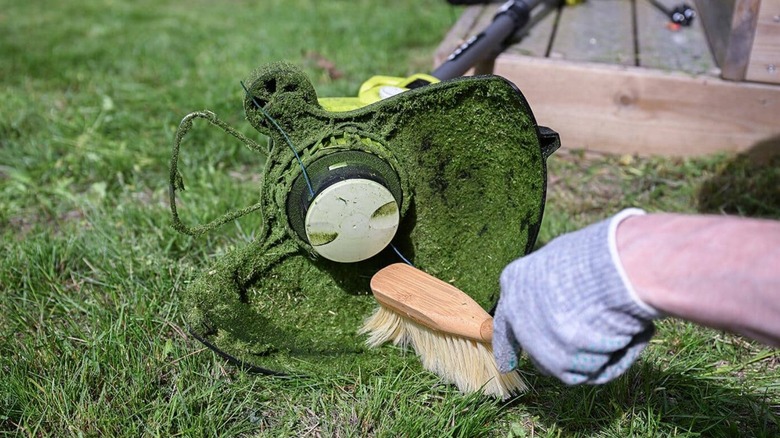
Prep the tools and brush the surfaces
 Natallia Ploskaya/Shutterstock
You're going to be using water to clean a majority of your equipment, so one of the first things you need to do is ensure that all electrical components are disengaged. Corded electric tools should be unplugged, battery-powered tools should have the batteries removed, and gas-powered tools should have their spark plugs removed. You'll also want to make an effort to keep any exposed electrical wires or contacts completely sealed to the best of your ability. It's never a bad idea to plastic wrap and tape battery contacts, power inlets, and wiring to add an extra layer of protection and prevent water from damaging your tools and exposing you to future electrical hazards. Additionally, you'll want to make sure that all gas and oil caps are secured so water doesn't get inside the tanks. Even with these precautions, it's a good idea to let tools thoroughly air dry before re-introducing their electrical components.
Once you've got the tool prepped, you'll want to take a soft brush or cloth and use it to remove heavy amounts of buildup. Cleaning off loose surface debris first will make it much easier to get to the more stubborn stains underneath. This is particularly important when it comes to mowers, which can get thick layers of grass and other plant matter that matts to the undercarriage. Quickly brush away as much of this loose material as you can so that you can more easily clean the surface underneath. One method that I've used when the brush wasn't cutting it was to simply put on a work glove and scoop out the grassy build-up by hand.
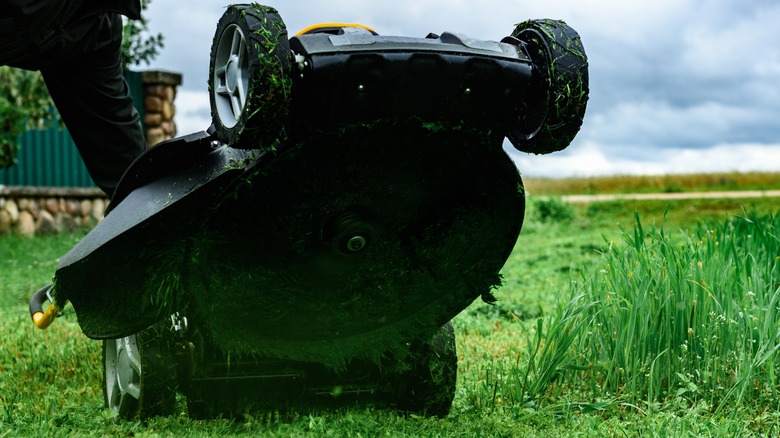
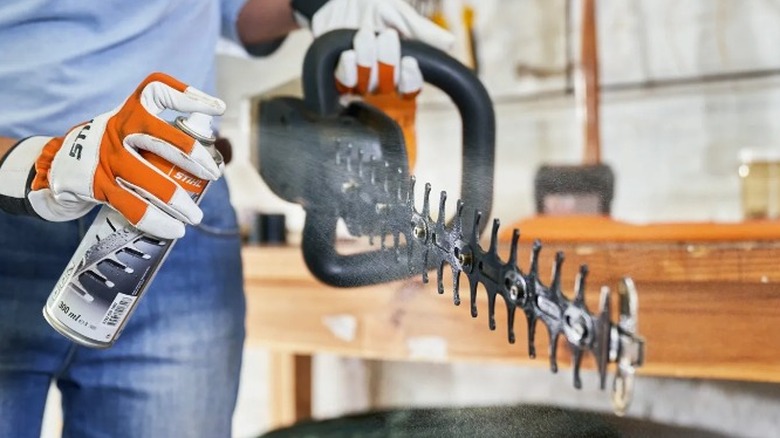
Hose and scrub off excess dirt and oil
 Home Depot
Now comes the time to actually get everything nice and clean. Some tools, such as chainsaws, will require specific cleaning methods, but the technique for cleaning mowers, string trimmers, edgers, cultivators, hedge trimmers, and powered pruners is going to be relatively similar.
Start by hosing off as much loose dirt and debris as you can. A regular garden hose with a jet sprayer works fine for this. You can use a power washer if you have one available, just be careful near any electronic parts and be careful not to strip paint or break any plastic components. Once you've washed away the top layer, you're going to want to add a degreasing solvent of some kind. This solvent should be environmentally safe, it should be good at cutting dirt and grease, and it should be safe to use on paint, metal, and plastics.
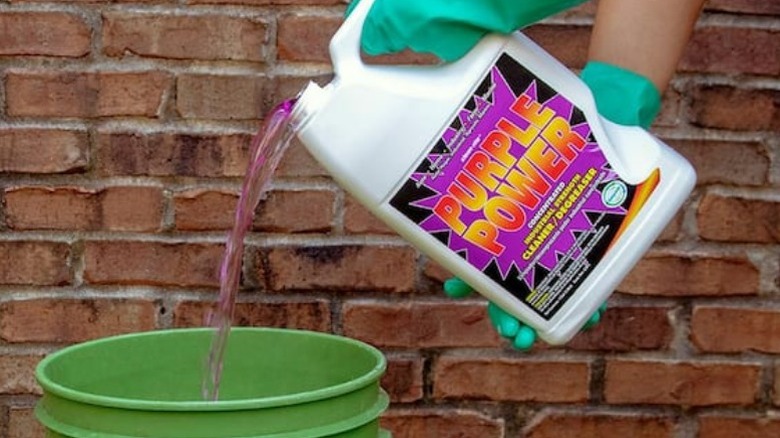
You can spray Super Clean Tough Task Degreaser on dirty tools and then leave it for a minute or two, which loosens the material and takes care of most of the removal without the need for manual scrubbing. Zep 505 Cleaner and Degreaser and Purple Power Industrial Strength Cleaner and Degreaser are both popular brands for these kinds of tasks as well. Though if the staining isn't too bad and you don't want to make an extra trip to the hardware store, you may also be able to get away with a bit of Dawn Dish Soap. This just might require a bit more scrubbing.
Once you've coated the dirty parts of the tool in the cleaning agent and given it a couple of minutes to soak in, give it a light scrub with the same soft-bristle brush and then hose it off again. Then just leave it out to dry.
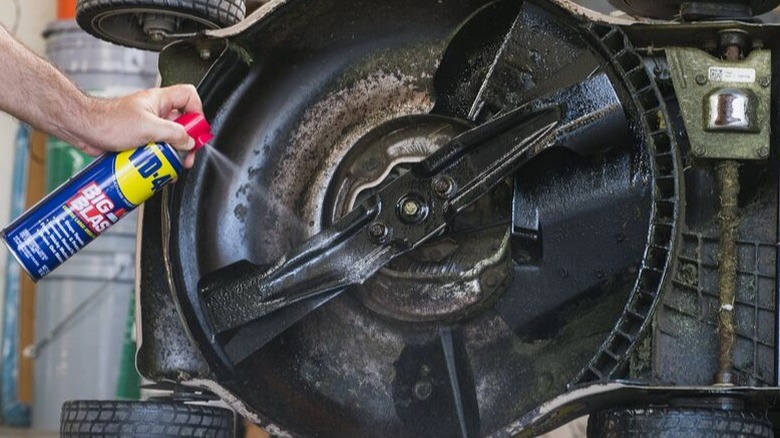
WD-40 can remove corrosion
 WD-40
WD-40
Those who have older tools, secondhand tools, or tools that have spent a lot of time out in the weather may already be seeing some corrosion on the metal. There are a few different ways to restore rusty old tools, but one of the best methods is to use WD-40. Simply spray it onto the corroded area, let it soak in for a few minutes, then scrub it with a bit of sandpaper or a wire brush. You can even use a drill-powered wired bush attachment if you want to save yourself some elbow grease. This is particularly good for heavy rust build up and narrow gaps that are difficult to scrub my hand.
Once the rust is completely scrubbed away, there are a couple of ways to keep it from coming back. Components that are supposed to have exposed metal can simply be coated in more WD-40, which will serve as a moisture-blocking agent. This will need to be regularly reapplied after each cleaning, but it works very well.
Alternatively, you can sand down any old chipped and eroded paint and then re-paint the tool in a fresh coat of Rust-Oleum Rust Reformer. This is an oil-based paint that converts rusted surfaces into a flat black, paintable surface, letting you add a fresh coat of enamel paint in whatever color you like on top. Rust Reformer bonds to rusted surfaces and prevents the oxidation from spreading. This makes it a great choice for someone who is completely renovating an old, heavily rusted tool and wants to get it looking like new again.
Wax and oil to help keep things clean and moving
 Stihl
Stihl
Once the tools are clean and rust-free, there are a couple of additional measures you can take to help keep them clean in the future. We've already discussed putting WD-40 on any exposed metal, but there are treatments that you can apply to help protect paint, joints, and mechanized parts as well.
You probably already know that waxing your car protects the paint from environmental damage caused by UV light, dirt, and oxidation, but you may not have considered that it can do the same for your mower. This helps to prevent dirt and debris build-up from sticking to your mower while you're using it and it makes clean up after a lot easier. You don't need anything fancy either. You can use the use the same kind of automotive wax you use on your car. This goes for any other tool with painted metal casings as well. A good wax will both protect the paint and give your tools that final shine that will help them look brand new again.
Joints and other moving parts can be particularly difficult to keep clean and moving the way they're supposed to as they are difficult to reach with a scrubber. It's all too easy for moisture and gunk to get trapped and cause erosion and friction to build up. To combat this, it's a good idea to use a silicone-based lubricant on any hinges, triggers, levers, or wheel hubs that your tools might have. This will protect them and keep them moving smoothly. Finally, any moving parts, (such as the spindles on mowers, cultivators, and edgers,) might benefit from a few drops of machine oil, or other specialized lubricant.
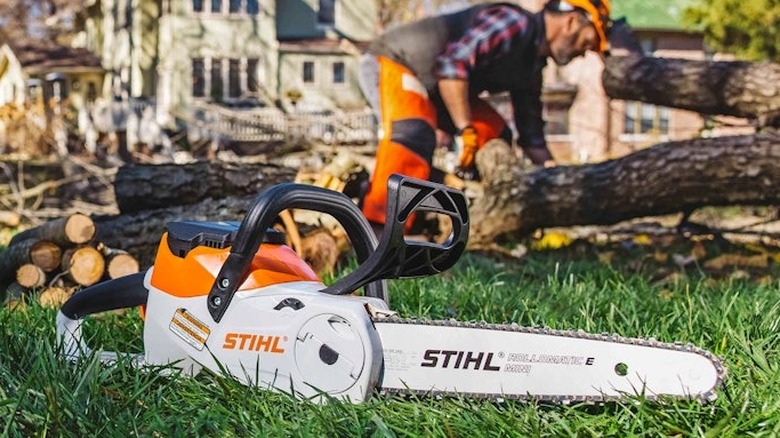
Chansaws have their own rules
 Stihl
Stihl
The cleaning methods outlined above are good for most power tools, but chainsaws are a bit of an exception. The process of cleaning a chainsaw is significantly more involved. You're still going to want to start by removing the power source (AC plug/battery/spark plug). You'll also want to engage the chain brake and put on a pair of safety gloves before cleaning. This should help to keep your fingers safe during the cleaning process as chainsaws are still sharp, even when they aren't moving.
One you're all prepped, use that same soft bristled brush from earlier to wipe away any loose debris, taking special care to clear the cooling slots with a brush or compressed air. Unlike with other tools, this is going to require a bit of dismantling. You'll need to remove the chain and guide bar and then use a file gauge to remove heavy build ups of oil and dirt, paying special attention to the oil outlet channel where the chain oil is applied as well as the oil inlet hold and groove. A good resin solvent like Trend Tool Blade and Bit Cleaner can help breakdown any organic buildup from plant resin, pitch, and rust as well.
Once that's done, you'll want to clean the housing, scrubbing away caked on dirt and sawdust. This can usually be done pretty easily with basic soap and water or any of the cleaning solvents mentioned above. A good brush can help clean the area around the sprocket as well.
Once that's done, you'll want to check the blade to see if the teeth need to be resharpened, then reassemble the tool, top off the chain oil tank, and store it sheathed in a clean, dry location.